Install Xet
If you've already installed and logged in via our Install Guide, go ahead and skip to our hands-on example.
The Xet installer adds natural support for managing large files via Git, Python, and the Xet CLI. Once installed, XetHub will manage all files in the repository, storing all binary files and files over 256KB on XetHub servers to take advantage of our efficient storage structure. Once installed, all normal Git commands will work as expected without any extra commands or storage setup.
A XetHub account is required for pushing changes to a repository or accessing private repositories. Create an account, login, and refresh this page before running the following installation and authentication steps.
- Easy Install (MacOS, Linux)
- Manual Install (MacOS)
- Manual Install (Linux)
- Manual Install (Windows)
Run our one-line installer from your terminal to download and authenticate with HTTPS:
-
Download and run the MacOS pkg installer.
-
Install Xet CLI with PyXet to use Python or CLI access patterns to work with repos.
a. Using a supported version of Python (3.7+), set up a virtualenv:
python -m venv .venv
source .venv/bin/activate
b. Install PyXet, which includes Xet CLI, with:
pip install pyxet -
Authenticate with HTTPS to enable pushing changes and accessing private repos.
a. Create your personal access token (PAT) by clicking "Create Token" from your User Settings PAT page .
b. Authenticate by copying the login string, starting with
xet login, and running it from your terminal:xet login -u <username> -e <email> -p <PAT>
Install Git-Xet
Ubuntu/Debian-based
-
Download the deb archive.
wget https://github.com/xetdata/xet-tools/releases/latest/download/xet-linux-x86_64.deb -
Install the deb archive with:
sudo apt install ./xet-linux-x86_64.deb -
Install the extension with:
git xet install
All Other Distributions
-
Download the compressed binary and unzip it.
wget https://github.com/xetdata/xet-tools/releases/latest/download/xet-linux-x86_64.tar.gz
tar -xvf xet-linux-x86_64.tar.gz
-
Move
git-xetto your preferred location and add it to your PATH so that Git can access it.sudo cp git-xet /usr/local/bin -
Install the extension with:
git xet install
Install Xet CLI with PyXet
Follow these instructions if you plan to use Python or CLI access patterns to work with repos.
-
Using a supported version of Python (3.7+), set up a virtualenv:
python -m venv .venv
source .venv/bin/activate -
Install PyXet, which includes Xet CLI, with:
pip install pyxet
Authenticate with HTTPS
Log in to enable pushing changes and accessing private repos.
-
Create your personal access token (PAT) by clicking "Create Token" from your User Settings PAT page .
-
Authenticate by copying the login string, starting with
xet login, and running it from your terminal:xet login -u <username> -e <email> -p <PAT>
Windows support has some known limitations. Please file any issues you encounter!
Advanced usage: For scripted installations, place our standalone Windows Git-Xet binary anywhere in your PATH.
-
Download and run the Windows Installer.
Using Microsoft Edge?
If you're on Microsoft Edge, your browser may block a full download of the installer and show an Unconfirmed .crdownload file in the Downloads folder.
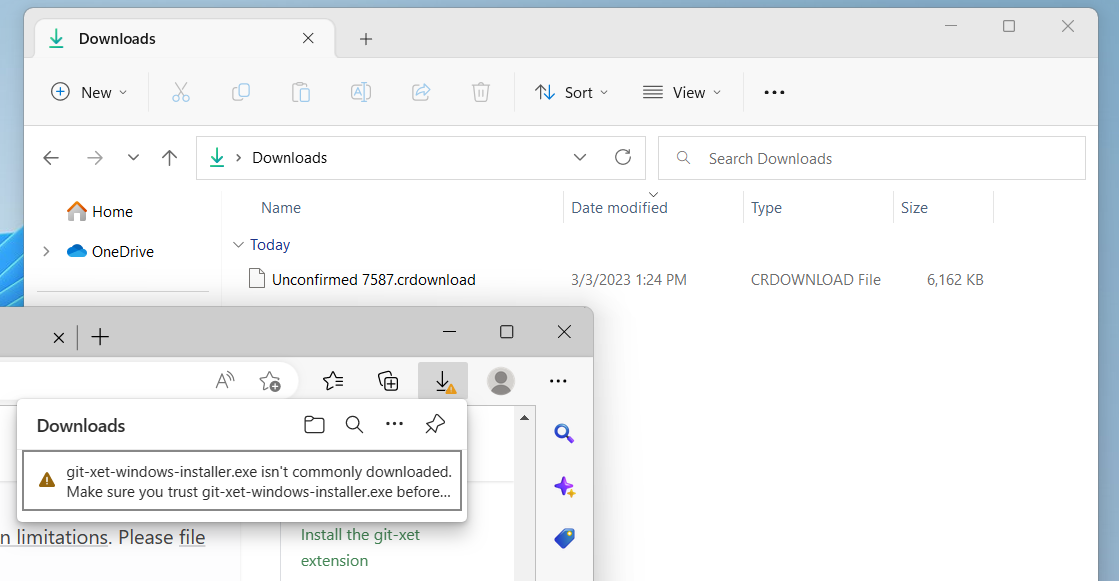
To fix this, go to the Downloads icon in Microsoft Edge and hover over the caution message to display the Trash and More options. Click the three dots for more options and choose "Keep". This may trigger the following warning.
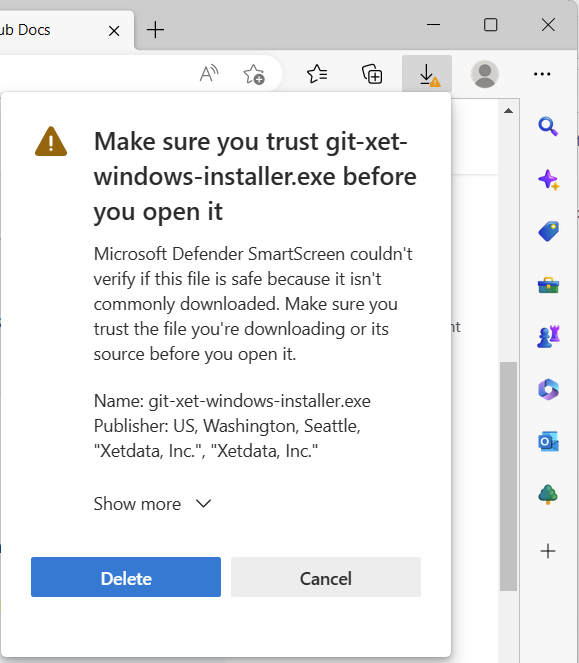
Click "Show More" to expand the options and click "Keep anyway". At this point, the .crdownload will turn into the real git-xet-windows-installer executable. If you have the time, we'd also appreciate if you can also "Report this app as safe" to help make it easier for everyone to access the installer!
-
Authenticate with HTTPS using your personal access token.
a. Navigate to the Personal Access Token setup page.
b. Click
Create Tokento generate a personalized login command.c. Run the generated command from your terminal.
Prefer working with SSH? Standard Git SSH authentication is also supported. If you are comfortable with configuring SSH keys, generate a SSH keypair and add the public key to your XetHub account.