Displaying model architectures with Netron
Model files in a file browser are usually opaque. XetHub brings underlying model architectures into view by supporting Netron visualizations. Reference the Netron project page for the most current list of compatible model types.
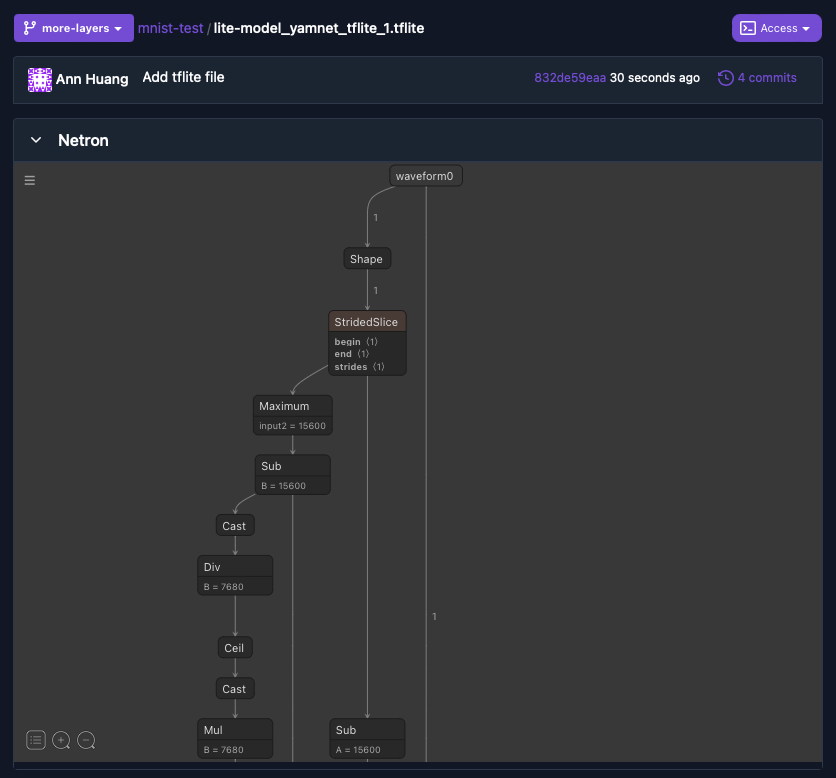
Viewing model architectures
Opening any supported model file from the XetHub UI automatically shows the Netron visualization of the model architecture.
To see this feature in full display, explore the ONNX Model Zoo repository and click through the models to see the Netron views rendered in browser.
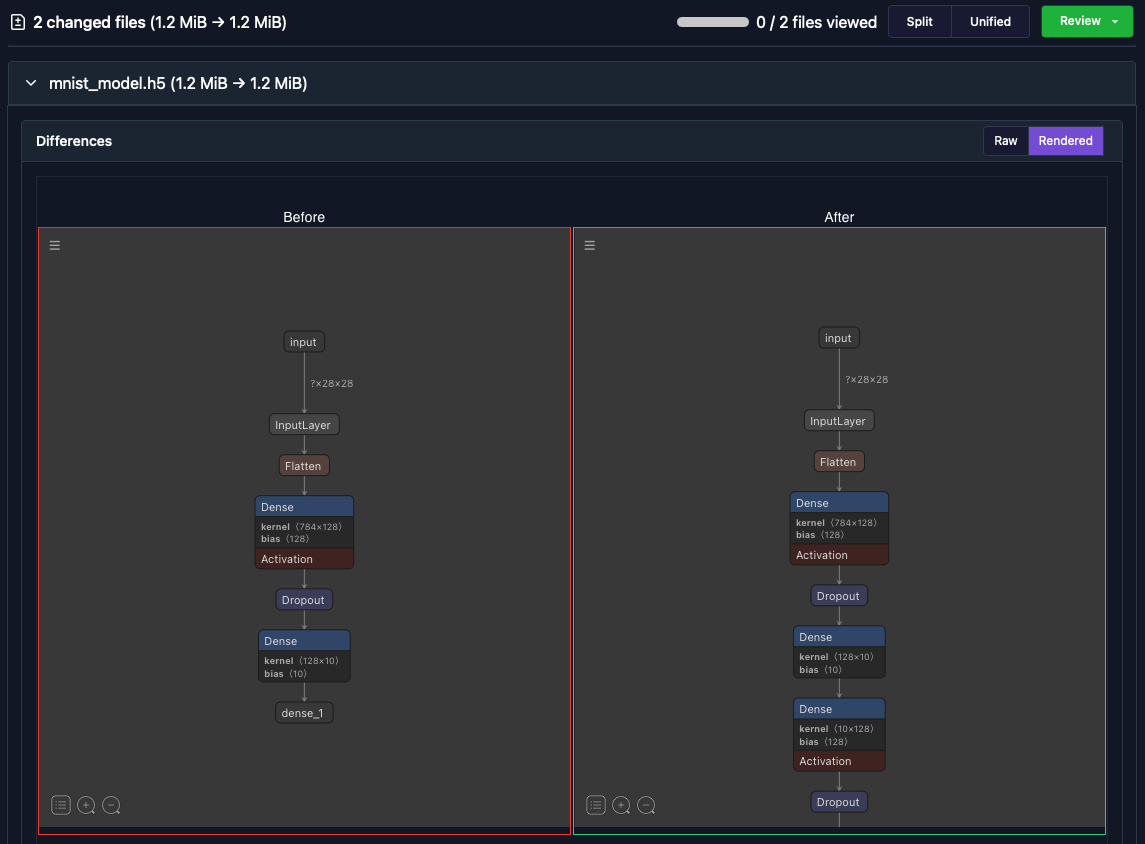
Diffing model architectures in XetHub
Viewing a single architecture is cool, but it's even more interesting to see how model architectures change over time. A natural place to show this evolution is through pull requests. You can see before-and-after Netron views on your model files on any pull request where the model has changed by navigating to the Files Changed tab of the pull request and expanding the file.
Diffing model architectures in GitHub
Before-and-after Netron views are also supported through our GitHub integration, which adds Xet large file support to existing GitHub repositories.
To see the differences, create a pull request and click the link to the diff view of the model. Note that code changes can still be reviewed within GitHub.
The link will take you to a side-by-side comparison of your models hosted on XetHub:

Pull request flow
Here's a quick walkthrough to demonstrate how it works with your ML workflow. This flow is ideal for reviewing model changes collaboratively with your team.
-
Create a new repository
- If using our GitHub integration, follow the instructions to install the app for your new repository
-
Clone the repo and create a
main.pyfile with the following code:import tensorflow as tf
from tensorflow import keras
from tensorflow.keras import layers
# Load and preprocess the MNIST dataset
mnist = keras.datasets.mnist
(train_images, train_labels), (test_images, test_labels) = mnist.load_data()
# Normalize pixel values to be between 0 and 1
train_images, test_images = train_images / 255.0, test_images / 255.0
# Define the neural network model
model = keras.Sequential([
layers.Flatten(input_shape=(28, 28)), # Flatten the 28x28 input images
layers.Dense(128, activation='relu'), # Fully connected layer with 128 units and ReLU activation
layers.Dropout(0.2), # Dropout layer to reduce overfitting
layers.Dense(10) # Output layer with 10 units (one for each digit)
])
# Compile the model
model.compile(optimizer='adam',
loss=tf.keras.losses.SparseCategoricalCrossentropy(from_logits=True),
metrics=['accuracy'])
# Train the model
model.fit(train_images, train_labels, epochs=5)
# Evaluate the model on the test dataset
test_loss, test_accuracy = model.evaluate(test_images, test_labels, verbose=2)
print(f'\nTest accuracy: {test_accuracy}')
# Save the model to a file
model.save('mnist_model.h5') -
Create a virtualenv and install TensorFlow:
python -m venv .venv
source .venv/bin/activate

pip install tensorflow -
Train your model locally and push the results to the remote:
python main.py

git add main.py mnist_model.h5
git commit -m "Push newly trained mnist model"
git push -
Navigate to your latest commit
- If using the GitHub app, you will find a link posted by the XetData bot to view the file in XetHub
-
Locally, check out a branch:
git checkout -b more-layers -
Modify
main.pyto add some more layers:layers.Dense(10), # Output layer with 10 units (one for each digit)
layers.Dense(128, activation='relu'),
layers.Dropout(0.1)When you're done with your changes, retrain and push the results again.
git commit -am "More changes on this branch"
git push -u origin more-layers -
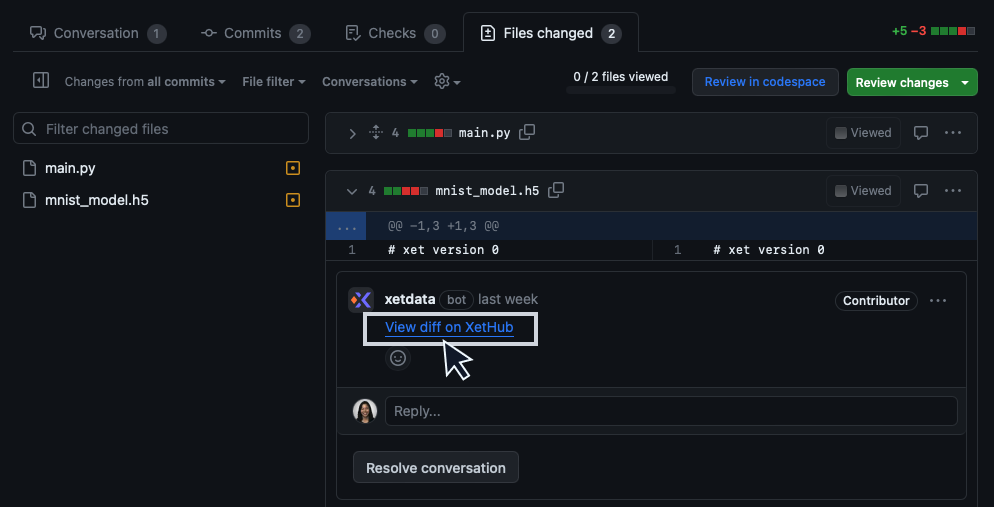
Create a pull request from the UI and navigate to the
Files Changedtab.- If on XetHub, expand the model file to see before-and-after Netron views.
- If on GitHub, click on the
View diff on XetHublink to see the before-and-after view in XetHub.